*** Update: Guys, before posting a question, please go through the post & comments already present in this post. I am getting a lot of questions which have clear answers in the posts or have been answered in the comments sections. In case you post a question here and I have just approved but not replied then please understand that the answer is present in post / comments or am posting for someone else to reply as I might have no idea about it.
This way I can get time to attempt to answer the questions which are not covered in either the post or comments and not repeating the same info again.
*** IMP Update: Cox and Kings would be the knew service provider to Indian consulate after May 20th. If you can, wait for them to take over than submitting your application to BLS.
*** Update: 06/04 As per comments from many others it seems like BLS is still handling passport services so ignore the comment above
http://ibnlive.in.com/news/indian-embassy-in-us-outsources-visa-passport-services-to-new-firm/470326-2.html
** Check the end of the post for issues related to BLS & USPS express packages
** Check comments for FAQ
Have woken from my long siesta to share some info on the process of getting an Indian passport renewed while staying in USA.
Thought of writing this post to help others like me, who may want to get their Indian passports renewed while staying in USA and are faced with little or minimal how to on the Indian consulate site.
***As of May 2013 The Consulate General of India outsourced the handling of Passport and related applications to M/s. BLS International Services Ltd [Earlier it was with Travisa]
Step 1: – Visit the Indian consulate site at http://www.indianconsulate.com/ [Check if another agency change has occured if not then the below is still valid info]
Step 2:- Visit the BLS International site at http://www.blsindia-usa.com/
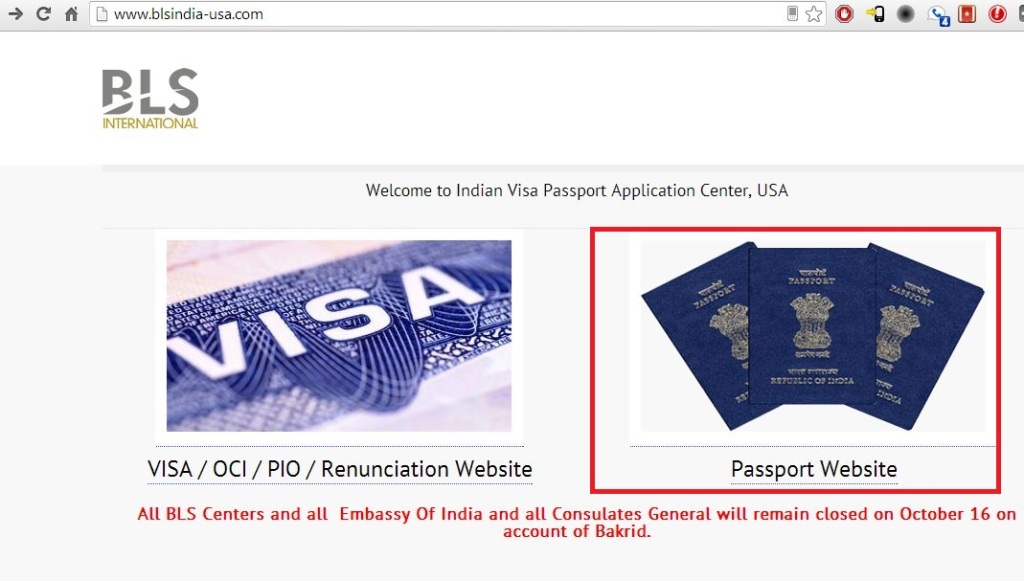
Step 3:- Click on the Passport link / image.
Step 4:– Click on the Passport menu ->> Reissue of passport after 10 years

You will be re-directed to a page which has a lot of data about the process – general information, application centers, documents required etc etc.
Step 5:-Read through this page for an overview of the process then go to the Indian Passport application center section.
Indian consulate has divided various states into regions and they have 1 office catering to multiple states, please make sure you understand which application center you need to apply to as per the state / region you live in. For me it was Chicago being in Indiana, click on the various application center’s to understand which center you fall in.

Step 6:- Go through the entire page to make sure you understand the process and the documentations required. The details on this page are pretty straight forward and shouldn’t be that hard to follow. I just had to get the passport reissued after 10 years hence my documentation requirement was pretty straight forward. Please check the page in detail as per your requirement.
Step 7: BLS needs you to fill an application form which can be found here http://blsindianvisa.com/orderform/passport.php
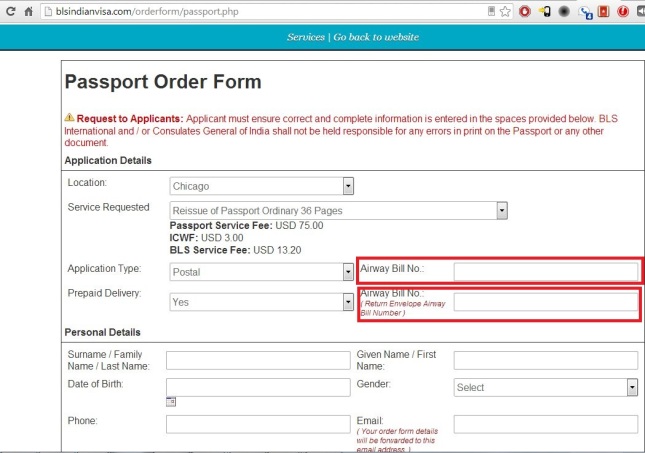
In this form most of the fields are pretty self explanatory , will mention a few just for clarity
a) Location – This needs to be the passport application center and not the region you are located in.
b) Airway bill no : Provide the tracking number of your shipment, this is further used to track the package delivery on BLS website. This is provided in the receipt / slip that you will have from your shipping. Yeah its kind of confusing for some but basically we need to go and get the envelops from postal services [USPS / UPS / Fedex] prior to filling the forms.
Shipping – Airway bill number
[Please read the section below on how to send the documents to BLS.]
c) Airway bill no [return envelope airway bill no] It is always a good idea to send BLS a self addressed return envelope. This provides 2 way tracking of the application. If your postal tracking shows dispatched that means BLS has processed your passport and its on the way. It sure helps to have a backup tracking mechanism.
 d) Address to be printed on passport:- This should be the US address as you are living in US, some people have reported even if they entered their Indian address it went through on the passport. I had called BLS center to check on this , as per them it should be US address only, but many of my friends have also got their Indian addresses printed without providing any address proof.
e) Payment details:- Here we have to mention if its a demand draft / money order / cashiers check and the check number associated with it. Please note cashiers check is not same as the normal check we receive on opening the bank account
Once you save this form , you will get an email on the email address which was provided by you , that email contains 2 documents
1) BLS Form :- Take a print out of this form , it needs to be submitted along with your documents in the application envelope.
2) BLS shipping label:- This contains the mailing address for BLS and your application / case number – Make sure that you paste this label along with your shipping label on the form. This has a barcode which gets scanned on receipt at the BLS office and it updates the tracker.
Step 8:- Once you are done with the BLS Passport form, its time to fill another form 🙂 The govt of India NRI passport application form located at https://passport.gov.in/nri/
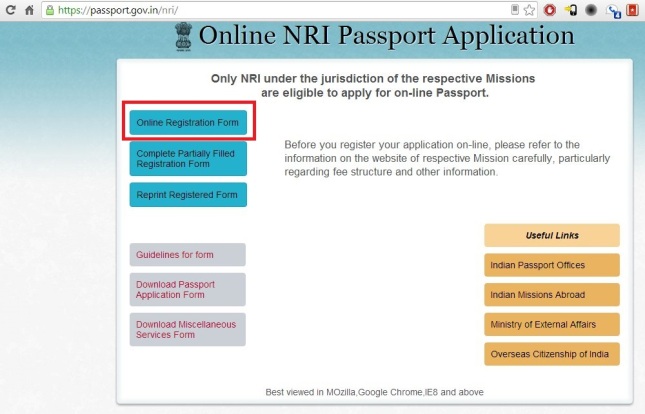
Before you start filling this form please note the following –
- Once you submit this form, you cannot go back and edit the form, the only way to update the info on this form is to fill up another form.
- If you are not sure of a few things in the form, do not submit. You can keep the form partially filled and fill later on based on the temporary application id received while filling the form. [check the image below for the location of temporary application id]

Select the appropriate Indian mission ie the application center and the type of service ie reissue of passport.
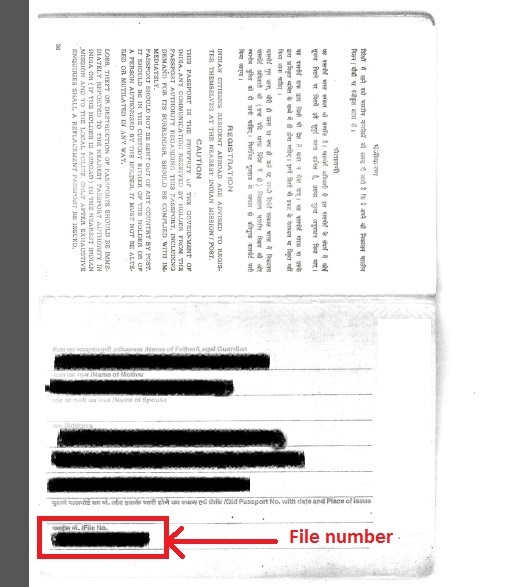
The only thing confusing in this form is “File number” required in the passport section. This information is available on the last page of your passport as shown in the image below.
Once done filling the rest of the information, click save and then print the form. In case you do not print the form, you can always go back and print the form with the web file number. Once you print the form, you will get a 3 page document which contains some of the fields pre- populated based on the info you just filled and some fields which you need to fill in now to complete the form.
Will mention some of the fields here for clarity.
- Amount paid should match the total of the amount shown at the BLS passport form, you can combine the total amount ie passport service + BLS service + ICWF for me it was $91.20.
- For delivery by mail … should be NA since you are sending a self addressed envelope to BLS. In case you do not then you need to pay extra for them to ship the package to you.
- Point # 10 : Education – People with Degree certificate etc fall under ECNR category. hence mention your education properly.
- Point #11: When did the applicant first leave India – If you read the question properly it asks you the first time you left India not when did you leave india for this trip, hence in case, this is not your first trip out of India please mention the date of your first travel out side India. You can find the date on the passport pages stamped on the adjacent page by your visa.
- Point #11: When was he / she last in India:- this should be the last time you left India if you haven’t yet returned to India then this would be your departure date- check the passport again for the exact date.
- Point #12: Total time outside India – This is the time from your last date in India till now.
- Point#13: Present emigration status ie ECNR or ECR- this is available on the 2nd page of your passport.
- Point #19: references – these can be anybody [other than family] even in India .
- Point #22: No of lost/damaged passport:- Since this is reissue of passport only mention NA here. Mention NA in the next few points where appropriate.
- Point #29: Sign in the boxes.
- Passport photo needs to be attached to the form in the designated space, Along with this the “documents requirements” section on BLS site mentions send 2 more photos. When I had called the BLS helpline they asked me to staple an additional photo at the end of the form below the signatures. I stapled one there and added an additional one by attaching it to the form with a u-pin.
Step 9:-Nationality verification form – Can be downloaded from http://www.passport.blsindia-usa.com/forms/NationalityVerificationForm.doc
- This form is pretty straightforward and doesn’t require any clarification – Its the same information which we have filled in the earlier 2 forms.
- The only confusing part here is in document requirements section they have mentioned take 3 copies of this form and in the checklist they have mentioned nationality form not forms. I got pretty confusing answers from people, after calling BLS they confirmed its 3 forms [no idea why] with 3 photos attached to them in the space provided.
**Tip: – We can either print this form and then write on it or we can type in the document and take a printout directly. I did the later, saved me time.
Step 10:- Documents required – what goes in the package
- Money order / cashier’s cheque or demand draft
- BLS filled form print out.
- NRI Passport Application form. [1 photo attached in the space on 1st page and 1 more at the end of the form below the signatures.]
- 3 copies of national verification form [each form needs 1 photo attached to it in the designated space]
- Photo copy of 1st 5 pages of passport. [Page numbers are mentioned on the passport in case you are confused.]
- Photo copy of the last 2 pages of passport.
- NOTARIZED Photocopy of the visa page in passport.
- Notarized photocopy of address proof for USA – either of Electricity bill, Mobile bill, Gas bill , internet bill , driving license suffices here.
- Optional: Photocopy of graduation / post graduation certificate Just to avoid any delays had attached photocopy of my Masters certificate.
- Optional: Affidavit for change in appearance – I had got my passport in my college days and as I had my travel trip planned within a couple of months from application for renewal of passport, I didn’t want to take the risk of any delays hence I had attached a change in appearance form along with the documents, its mentioned on the BLS site and can be located at the following location – http://passport.blsindia-usa.com/forms/ChangeInAppearanceAffidavit.pdf
- Passport [Don’t forget this, its very easy to forget, also ensure you have removed the i94]
**** Tip: We can get the documents notarized at various locations in the city – banks, post office , mostly companies have a notary on their payroll too. Else the ones outside charge something around $7-$9 per document going up to a upper bar on the amount something like $20 irrespective of how many you notarize. If you have a bank account visit their branch they will do it for free.
Update 01/27: It seems Bank of America has stopped notarizing documents, PNC bank still continues to do so. Also read my comment below which has a link to diff places we can get notarization done.
**** TIPS ****
- Make a photocopy / scan important pages of your passport. Remember your passport identifies you as a valid Indian citizen.
- I have the habit of scanning any form I send, hence I have kept a scanned copy of all the forms , cashiers check etc sent for this application.
- Hand delivering the package doesn’t add any value to the processing time, I had called and confirmed with BLS if it would help in speeding the processing time. Of course If you live in the same city might as well go and visit personally. For me it was a drive from Southern Indiana to Illinois and not worth the time.
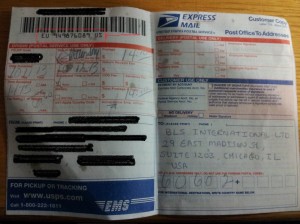
- You have an option of sending the package via USPS / UPS / Fedex. I chose USPS as it was right next to my office and it provided Express overnight delivery at a good price $15 envelope and $19 for cardboard box as of 11 OCT 2013.
- Make sure while getting the envelope from post office , you take a printout of your document to make sure you can fit them in and don’t have to fold them in.
- I took a cardboard envelope and a normal envelope for express shipping ie overnight shipping and put the self addressed shipping slip on the cardboard envelope and the TO BLS shipping slip on the normal envelope.
- While sending the documents , put them in the semi hard envelope [do not seal this] and then put the semi hard envelope inside the normal envelope which is addressed to BLS. [this gives your documents and passport the extra layer of protection].
- IMP info: I had shipped on Friday 11th and the package reached BLS office on 12th , as the office was closed on Saturday the delivery person took it back to the post office and left a notice for them. I had called USPS call center and then the local post office to make sure they redelivered to BLS. They had already planned to redeliver on 15th and the nice lady at the Chicago local post office went and checked to confirm if it had been sent out. I had explained the package contains imp documents ie passport etc to her. Hence please time your package delivery accordingly, make sure it reaches them on a working day [Mon – Friday] and also take into account any holidays in the week to avoid wastage of days 🙂
- Photo — Based on my friend’s recommendations had visited CVS, Wallgreens for getting a pic clicked, unfortunately I didn’t find any of their service good. The camera used by them were old, i had my doubts it would work and also pics clicked by them sucked big time and did not follow the photo specifications specified by the consulate at all. [Remember its 2 X 2 like US pics and not the 3.5 or XXX we have back in India].
- I finally visited SAMS club and they had proper equipment and in the system they had a proper template which checked for the placement of eyes, chin, ear in the pic as per the specifications. The quality of the pics was too good. [This was in Columbus, Indiana maybe your luck might be better in your region]
- Passport photos can be clicked at post office too. [I found this out while finally sending the package, they charge a whopping $15 for 2 photos]
- Some people suggest online sites http://www.epassportphoto.com/ , http://www.idphoto4you.com/ which help you crop the photo in the passport photo specifications.-personally feel its nor worth the hassle and risk to save approximately $20 – $25 [unless you do not have a time constraint] but of course choice lies with you.
- Payment:- Payment modes allowed are Demand Draft, Money Order, Cashiers check. Cashiers check is usually free to bank’s account holders check with your bank. Mine was PNC and they provided it free of cost to me.
- Copying and pasting from a reply to question as per suggestion by Keerti.
BLS drops the packages in the drop box in their building. Unlike Fedex & UPS , USPS express packages need to be hand delivered in the post office to be considered as express mails [in spite of express mail packaging]. The express packages received via drop box get treated as normal mail and are processed as per the standard mail duration. I went through the same scenario during my application resulting in me running around USPS office and BLS/ consulate to track my missing passport.[BLS site claimed it was dispatched while USPS had no acknowledgement of receiving the parcel]
This was confirmed to me by USPS office / USPS pickup guy and they also told me they have repeatedly asked BLS not to drop express packages in drop box yet they do the same to save a few efforts [USPS office is 2 blocks away from BLS office]
Unfortunately, you won’t be able to track on USPS tracking site till it reaches a distribution center near your city. It took 3 days from Chicago to Columbus, IN. USPS showed no record of receipt of my passport till it reached Indy the reason being it gets acknowledged only at the distribution center, in my case Indy.BLS had dropped it on Monday and I collected it from Columbus USPS on Wednesday morning. Till Tuesday 8:00 PM USPS site showed no record of receiving the package.
Let me know if I missed adding any important info , would be happy to add more to this post.
**** Disclaimers ****
- All the urls mentioned in the post are from BLS India website.
- This is my understanding of the process and how I got my passport renewed, please make sure you visit their website and ensure the process has not changed since the date of this post.
Let me know your feedback on what is missing, what should be added etc
P.S: I had applied in the month of Oct 2013


